
Related Articles


Trending Articles


NEWEST ARTICLES
The turkey may be the star of the traditional Thanksgiving feast, but the sides are arguably the best part. Where would tom turkey (or tofurkey) be without his stellar supporting cast of buttery mashed potatoes, fragrant sage-infused stuffing and tangy cranberry sauce, after all?
We settled the debate on the most-beloved Northeast food, now we know where you stand on Thanksgiving side dishes. Eight essential turkey companions duked it out for our Thanksgiving Sides Showdown, but in the end stuffing won over mashed potatoes 61% to 39%.

616 total votes
Stuffing – 61% (winner)
Mashed Potatoes – 39%
1,483 total votes
Stuffing vs. Cranberry Sauce
Stuffing – 85% (winner)
Cranberry Sauce – 15%
Biscuits vs. Mashed Potatoes
Mashed Potatoes – 86% (winner)
Biscuits – 14%
7,283 total votes
Biscuits vs. Cornbread
Biscuits – 54% (winner)
Cornbread – 46%
Mashed Potatoes vs. Sweet Potato Casserole
Mashed Potatoes – 69% (winner)
Sweet Potato Casserole – 31%
Green Bean Casserole vs. Cranberry Sauce
Cranberry Sauce – 73% (winner)
Green Bean Casserole – 27%
Stuffing vs. Mac & Cheese
Stuffing – 93% (winner)
Mac & Cheese – 7%
Now that you are good and hungry, we’ve rounded up some of our favorite recipes from the web to help you with this year’s Thanksgiving or Friendsgiving meal.
If you want to soak up every last tasty drop of your Thanksgiving dinner, you are going to need a good biscuit.
There are two types of biscuits: rolled and drop. Rolled biscuits require rolling out the dough and cutting them into shape. These will rise more while baking and will typically yield a flakier result. Chef Jumoké Jackson aka @mrfoodtastic, has the method mastered. Follow him on Instagram and you’ll see why his buttermilk biscuit recipe is so sought-after. He even offers regular virtual biscuit-making classes for those looking to learn his secrets.
Drop biscuits like these from Serious Eats are not as pretty – think Red Lobster Cheddar Bay, but they can be all the fluffy, buttery things you love about biscuits with half the work. The dough can be made completely in a bowl or a food processor and is simply plopped down in spoonfuls into a tray to bake.
No matter how you make them, the key to light, flaky biscuits is to keep your butter as cold as possible and not overwork the dough.
There is very little documentation of what was actually eaten at the first Thanksgiving, but one food mentioned in the records is cornbread made with corn harvested by the Native Americans. Cornbread of the modern Thanksgiving table – a quick bread often baked in a cast iron skillet made especially delicious when slathered with honey butter – is likely much different than what was served at Plymouth, but it can be thought of as a nod to the holiday’s true history.
Marshmallows or no marshmallows? That is the question.
For some, the classic sweet potato casserole with its caramelized topping of chopped pecans or walnuts, brown sugar and toasty marshmallows delivers an over-the-top sweetness that should be reserved for dessert; for others, it’s exactly what Thanksgiving side dish dreams are made of. If you crave the classic in all its gooey goodness, this sweet potato casserole with marshmallows, pecans and cornflakes from Southern Living is the recipe you are looking for.
For a healthier version that cuts the butter and sugar and highlights the immune system-, gut- and overall health-boosting benefits of sweet potatoes, try Cooking Light’s sweet potato casserole with crunchy oat topping.
Mashed potatoes are a go-to side for a Thanksgiving meal. Buttery and smooth (perhaps with the addition of sour cream like Ina Garten does) or rustic and garlicky, it’s a dish that can stand on its own but is also a supreme vessel for gravy.
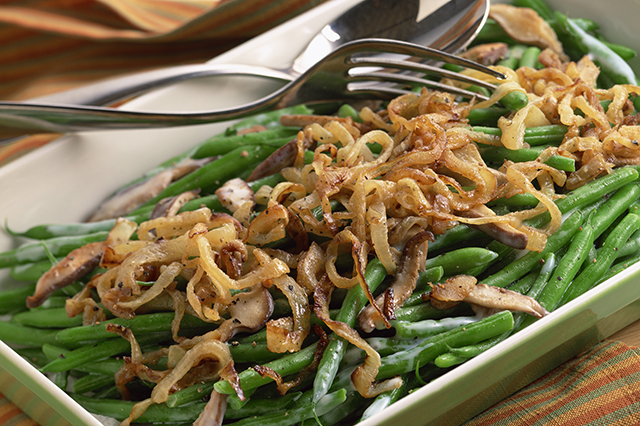
An American classic made with five ingredients, including a can of cream of condensed mushroom soup and crispy french fried onions, some version of this green bean casserole has likely graced your Thanksgiving table.
If you’re more of a from-scratch type of person, try Bon Appetit’s, made with cremini mushrooms and garlic parmesan béchamel sauce. If you’re completely over the casserole but still want to serve green beans, you might like Williams Sonoma’s green bean bundles with bacon and brown sugar instead.
Bright cranberry sauce breaks up the monotony of savory flavors on your dish and pairs perfectly with turkey. Make this homemade version from Simply Recipes with fresh or frozen cranberries and add orange zest, cinnamon, pecans and other fruits or spices to incorporate more of the holiday flavors that everyone craves this time of year.
If you prefer slices of gelatinized cranberry sauce that jiggles its way out of a can, that’s OK too. The holidays are all about tradition and nostalgia, and if that’s your tradition, bring on the can opener!
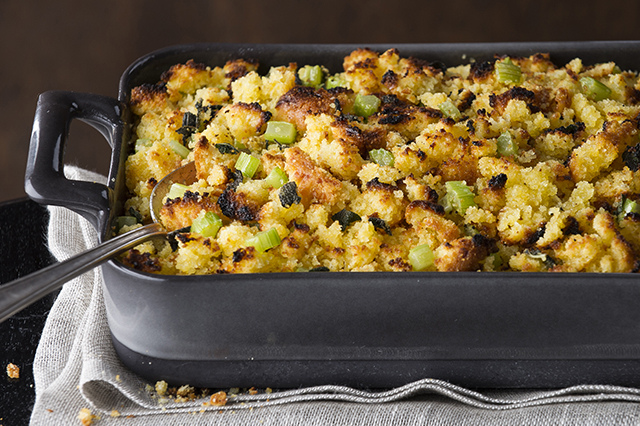
Stuffing and turkey go hand-in-hand – or hand in, never mind. Like other must-have Thanksgiving sides like mashed potatoes and cranberry sauce, the ideal holiday plate just wouldn’t be complete without it.
Technically, if it’s outside the bird it’s called “dressing,” but it’s the same ingredients and baked outside of the bird is generally safer. We like this traditional sage stuffing from Food52 and this gluten-free cornbread stuffing from Ambitious Kitchen.
It may be rich, and you may not have enough room on your plate or in your stomach for it, but macaroni and cheese is the kind of Thanksgiving side that separates a holiday meal from every other. Alton Brown’s recipe comes highly rated with thousands of reviews. If someone in your family is dairy-free or vegan, try the “mind-blowing” vegan mac and cheese from Sarah Crawford @bromabakery.
And if you love the turkey more than the sides, here are a few tips – including advice from a Butterball Turkey Talk-Line expert, on how to choose, cook and season your bird for the tastiest results.
Do you agree that stuffing is the best Thanksgiving side dish? Tell us your favorite in the comments below.


The Northeast is home to a plethora of great hiking spots for every skill level. But if you’ve never hiked before, hitting the trails might feel a bit intimidating. See how to prepare, dress and pack for your first hike with this list of tips and other hiking essentials for beginners.
Prior to your outing, take a couple of steps in advance to make the most of your hike later.
First, check the weather forecast. Not only will you want to know the temperature to decide how to dress, avoiding precipitation is key to a safer, less stressful hike.
Eat a hearty, healthy breakfast or lunch, depending on when you plan to hike. You’ll want plenty of energy to get you through your trek.
Let someone (a family member, friend, neighbor, etc.) know where you’re going, especially if you’re heading out alone – just in case you get lost or injured during your hike.
If you plan to do a lot of hiking this season, consider taking a first aid or navigation course. The American Red Cross, Adirondack Mountain Club and Appalachian Mountain Club are both helpful sources.
The perfect list of hiking essentials varies from person to person, but these supplies are a good place to start.
Proper footwear is arguably the most important item for a hike. To find your best hiking shoes, consider your athletic ability, experience level and the type of hiking you’ll be doing.
If you have strong ankles, lightweight boots or trail-running shoes are sufficient, otherwise go for stiffer midweight hiking boots.
Once you have a type of shoe in mind, you’ll want to make sure the fit is right.
“Your heel should be locked in place inside the boot to prevent blister-causing friction, and there should be minimal extra space around your foot (although you should be able to wiggle your toes freely),” according to the Appalachian Mountain Club.
Pro tip: It’s best to break in new shoes before going on a longer hike.
Staying hydrated is imperative during a hike. Have at least one quart of water for each person on your trip.
Reusable bottles are the way to go. Wide-mouth, collapsible and insulated bottles are all great options.
Also, consider a way to purify more water in case of an emergency. Squeeze-style or pump filters take up some room and require a bit of effort to use but are better for groups or longer trips. Bottles like the GRAYL GeoPress and Katadyn BeFree come with filters, making them a good backup for solo treks.
See this guide for information on boiling water, chemical treatments and using ultraviolet light to kill microorganisms and purify water.
Using insect repellant can help keep you protected against mosquito-borne illnesses as well as Lyme disease and other diseases carried by ticks.
Bug repellants come in many forms, including sprays, lotions, oils and wipes. Each has their own pros and cons, so choose which best suits your needs. Four of the most common ingredients in bug repellants are DEET, picaridin, permethrin and oil of lemon eucalyptus.
DEET and picaridin are effective against biting insects by hiding your scent. Both can be used on the skin and clothing. DEET offers a few more hours of protection by comparison but will damage plastics and certain clothes, can come off as you sweat and feels greasy to some people. Picaridin is odorless and non-greasy.
Permethrin should not be applied to your skin. Being an insecticide, permethrin kills mosquitoes and other bugs that come in contact with it. “Use 0.5% permethrin to treat clothing and gear (such as boots, pants, socks and tents) or buy permethrin-treated clothing and gear,” according to the Centers for Disease Control and Prevention.
Oil of lemon eucalyptus is moderately effective compared to the others but is more natural. It’s the most effective and long-lasting plant-derived formula; however, some products shouldn’t be used on children under three, according to the EPA.
Always use bug-repellant products as directed, and try wearing long sleeves and pants for another layer of protection. Use the EPA search tool to find your preferred bug repellant.
Pro tip: Bring a lint roller and use it to help pull ticks off your clothing after a hike.

You can buy a pre-assembled first aid kit or create your own.
Either way, make sure you have these essentials: antibiotic ointment, hydrocortisone cream, bandages, gauze, adhesive tape and adhesive padding (like moleskin) to treat cuts/scrapes, bug bites/stings and blisters. You’ll also want supplies to treat a sprain, like ACE bandages and a pain reliver/inflammation reducer, like ibuprofen.
To complete your first aid kit, consider a pair of scissors – to cut gauze, moleskin, etc. – and a whistle to alert others if you’re ever in trouble.
Bring along some calorie-dense foods to keep you feeling full and energized during your hike.
Snacks like jerky and energy/protein bars (like Larabar, Clif Bar, ProBar, Luna and Kind) are quick and easy, but be wary of too much salt, which can make you feel thirsty.
Nuts and seeds – like almonds, peanuts, walnuts and sunflower seeds – and nut butters are lightweight and packed with protein. Dried fruits and berries, like banana chips, dried cherries and raisins, along with dark chocolate, have a good amount of calories and will satisfy a sweet tooth. Put it all together to make a trail mix.
When dressing for a hike, layering is a great way to stay warm or cool off.
Wear or bring a hat, like a baseball cap to block the sun or a beanie to keep your head and ears warm. Also, have an extra pair of socks, in case your feet get too damp with sweat or you sustain an injury.
“Good hiking socks wick moisture away from your skin and provide padding for your feet,” according to Appalachian Mountain Club. You should avoid cotton, and go for a mix of materials, like acrylic, nylon, polyester and polypropylene (or olefin). These synthetic fibers dry quickly and add durability.
Finally, consider a light jacket to combat a chilly breeze or sudden shower. A water resistant nylon windbreaker is lightweight and will keep your dry for a short period of time. A waterproof jacket will keep you drier, but will likely be heavier as well.
You’ll also want to protect your skin and eyes from the sun’s harmful rays.
Go for sunglasses that feel comfortable sitting on your face and ears while offering ultraviolet protection. When it comes to sunscreen or suntan lotion, the FDA recommends using a broad-spectrum SPF 15 sunscreen for protection, but the American Academy of Dermatology recommends using a broad-spectrum sunscreen with an SPF of 30 or higher.
Sun protection clothing and lip balm are other supplies worth considering.
Navigation tools like a map and compass are trustworthy and essential – you don’t have to worry about batteries dying or losing a signal. Always carry a map of the trail; if you take a picture of it on your smartphone, you’ll be able refer to the map on your camera roll even if there’s no cell service.
For an added level of security, consider a separate GPS device or personal locator beacon.
In case clouds roll in or sunset comes faster than you were excepting, consider bringing a light source. A simple flashlight – separate from the one on your phone – or a headlamp, to keep your hands free, will do.
A lighter, waterproof matches and/or fire starter are other helpful tools. They’ll offer light and the ability to make a fire, if needed.
Some additional tools you might want to consider for your hike are a knife, multipurpose tool and/or duct tape. A multipurpose tool will help you repair to your sunglasses, cut a piece of gauze, pull out a splinter and more.
You might also want to bring some emergency shelter. A tarp, Bivy bag or emergency blanket are all good options – and a heavy-duty garbage bag will do in a pinch.
Bring along some travel-size hand sanitizer and/or disinfectant wipes and a spare face mask.
Last, but certainly not least, you’ll need a way to carry all your hiking supplies. A backpack is the perfect method.
You’ll want a pack with comfortable straps, plenty of pockets and a loop/key ring or two for a carabiner and/or your safety whistle, hand sanitizer, etc.
Comfortable, lightweight backpacks like the Osprey Daylite Daypack and Gregory Packs are great for hiking beginners.
Pro tip: Bring a trash bag to keep garbage away from the rest of your supplies.
If you’re planning on a longer trip outdoors, AAA members can save on RV rentals at Outdoorsy.
Are you going hiking this season? Tell us about it in the comments.


No one likes being sick. But as the temperature drops and people start spending more time indoors, the risk of catching a cold, flu or other infection increases significantly. Your immune system is your first line of defense against sickness.
Learn how you can boost your immune system naturally with these tips.
The immune system is a complex network of cells, organs and tissues that work together to help your body combat disease and infection.
Humans are born with some innate immunity. This includes skin, mucus membranes and the lymphatic system, which produces, stores and carries white blood cells that fight infections and other diseases. Acquired immunity happens when you get infected and recover from an illness or when you’re vaccinated.
There’s no quick trick or magical pill for developing a perfect defense against illness, but there are some steps you can take to boost your immune system naturally.
There’s still much to be learned about how gut flora and the immune system are linked. But probiotics, which strengthen the good bacteria in the gut, can help with digestion and better your immune system.
“There are two ways to get more good bacteria into your gut: fermented foods and dietary supplements. Fermented foods are the most natural source,” according to Harvard Health Publishing. “Probiotic supplements, which are typically sold over the counter, are reserved to treat specific ailments as suggested by your doctor, and not recommended for everyday use.”
Foods that typically contain probiotics are fermented foods like kimchi, pickles, sauerkraut, miso, tempeh, sourdough bread and some cheeses (cheddar, gouda, mozzarella). Just be aware of your salt intake. If you’d prefer to drink your probiotics, there’s kombucha – a fermented tea drink, and kefir – fermented milk.
Yogurt is touted as one of the best sources of probiotics. Different types and brands of yogurt boast different amounts of probiotics – anywhere from 90 billion to 500 billion colony-forming units per serving.
When it comes to eating yogurt, make sure to check the sugar content. Look for options with “active” or “live” cultures that have more protein than sugar.
Eating a diverse diet provides your body with the nutrients it needs to support your immune system. You want to focus on eating a mix of whole foods, especially fruits and vegetables, which provide a wide array of vitamins, minerals and other nutrients.
“Malnutrition or a diet lacking in one or more nutrients can impair the production and activity of immune cells and antibodies,” according to Harvard School of Public Health. “Diets that are limited in variety and lower in nutrients, such as consisting primarily of ultra-processed foods and lacking in minimally processed foods, can negatively affect a healthy immune system.”
There’s a reason why we’re told to drink plenty of fluids when we’re ill. To be proactive, get in the habit of drinking enough water everyday.
While drinking water alone doesn’t necessarily give your immune system a boost, water keeps our bodies functioning properly. Drinking water aids in digestion, helps carry nutrients and oxygen to your cells, protects organs and tissues, regulates your body temperature and more.

Taking supplements may sound tempting – especially when some packaging makes flashy claims – but they may not be as beneficial as you’d think.
“Although some preparations have been found to alter some components of immune function, thus far there is no evidence that they actually bolster immunity to the point where you are better protected against infection and disease,” according to Harvard Health Publishing. “Demonstrating whether an herb – or any substance, for that matter – can enhance immunity is, as yet, a highly complicated matter.”
However, supplementing for nutrients you’re currently lacking can be beneficial. For example, many Americans are vitamin B6- and vitamin D-deficient. Some women ages 12 to 19 are iron-deficient. Talk to your doctor about any supplements you are – or potentially should be – taking. You may want to consider having bloodwork done to see if you have any deficiencies.
There are five micronutrients – vitamins B6, C, E, magnesium and zinc – that help maintain immune function.
“Supplements containing them are often sold as immune boosters in doses that greatly exceed the recommended daily allowance. However, there is no evidence that such supplements have more benefits than merely following a healthy diet,” according to Harvard Health Publishing. “Rather than popping pills to get these micronutrients, you’re wiser to use various foods to boost your immune system.”
What’s more, supplements don’t have the same FDA oversight as medications, meaning it’s likely safer and more effective to get immune system-supporting vitamins naturally, from food.
Try eating more of these vitamin-rich foods:
Vitamin B6 – Bananas, lean chicken and pork, salmon, sweet potatoes, fortified tofu.
Vitamin C – Bell peppers, citrus fruits, guava, kiwi, strawberries.
Vitamin E – Almonds, avocados, butternut squash, spinach, sunflower seeds.
Magnesium – Brown rice, dark leafy greens, lima beans, squash and pumpkin seeds, tuna.
Zinc – Beef, chicken, pork, firm tofu, lentils, oysters.
“Just like a healthy diet, exercise can contribute to general good health and therefore to a healthy immune system,” according to Harvard Health Publishing. “It improves cardiovascular health, lowers blood pressure, helps control body weight and protects against a variety of diseases.”
On the other side of the spectrum, obesity – and the low-grade chronic inflammation associated with it – can hamper the immune system.
To stay active, exercise regularly by going on a bike ride a few times a week or taking a 20- to 30-minute daily walk. If it’s too cold outside, check out these ten indoor workouts to stay fit and boost immunity.
Save on Active&Fit Direct membership with AAA Discounts. Choose from thousands of fitness centers and studios nationwide and get access to thousands of guided workout videos.
Stress weakens the immune system, according to numerous studies since the 1980s as well as psychologists in the field of psychoneuroimmunology.
Some stress is natural and largely unavoidable. But, “people who are older or already sick are more prone to stress-related immune changes,” according to the American Psychological Association.
Learn more about how too much stress impacts your health and ways to cope with daily stressors.
If you want your body to be able to defend itself, avoid consuming harmful substances. Protect your respiratory health by not smoking. And, if you drink alcohol, only drink in moderation.
“Clinicians have long observed an association between excessive alcohol consumption and adverse immune-related health effects such as susceptibility to pneumonia,” according to U.S. National Library of Medicine. “This association has been expanded to a greater likelihood of acute respiratory stress syndromes … and slower and less complete recovery from infection and physical trauma.”
Sleep is an essential part of supporting your immune system. Getting enough high-quality sleep is proven to strengthen your body’s defenses and helps vaccines respond more efficiently.
Not enough sleep can even increase your chances of getting sick. “In the short-term, the risk of infections has been found to be higher in people who sleep less than six or seven hours per night. Studies have found that insufficient sleep makes it more likely to catch the common cold or the flu,” according to the Sleep Foundation.
How will you support your immune system this winter? Tell us in the comments.


No matter how pretty a snow-covered landscape may look, it’s easy to come down with a case of cabin fever during the winter season. Don’t let a little chilly air get you down! Tell Jack Frost to get lost with these tips on how to beat the winter blues.
[Note: This content is for informational purposes only and is not intended to be a substitute for professional advice, diagnosis, or treatment.]
It’s easy to skip your workout when the cold weather hits, but heart-pumping activities can make you feel better both physically and mentally. Take the time to appreciate the season with winter-exclusive activities, like ice skating, skiing and snowshoeing. Even clearing your car and driveway of snow will help get your mind and body moving. If the great outdoors isn’t for you, try bowling, walking around your local mall or take a yoga class.
Don’t forget to don your warm layers for any outdoor activity. The American Heart Association recommends starting with a layer of high-performance sportswear to pull moisture from sweat and snow off your skin. Follow up with a fleece layer, and finish with a thin waterproof layer. And remember to stay hydrated.
Winter was made for food that warms you from the inside out. The NZ Nutrition Foundation recommends a hot bowl of soup or stew for a chilly day indoors, especially those loaded up with lots of vegetables, beans and protein. Oily fish like salmon are a good source of vitamin D, which helps to boost the immune system when we can’t get our daily dose of sunlight.
Make sure to use garlic in your dishes as well. Garlic has been shown to fend off diseases, keeping you healthy and happy during cold and flu season. For the most benefits, chop garlic and let it stand 10-15 minutes before cooking.
If you’re new to cooking at home or just have trouble thinking of recipes, Home Chef is a subscription box that provides everything you need to create delicious meals, from fresh ingredients to step-by-step instructions. Bonus: AAA members can save on their first four boxes.

A new hobby is a sure-fire way to beat the winter blues. Get crafty and teach yourself to knit or crochet a warm scarf or hat, test out new recipes in the kitchen or spruce up your home with organizing and decorating projects. Get the whole family involved for some cold weather bonding. Snowman-building competition, anyone?
Sometimes the best thing you can do for yourself is nothing. Take time to sit by fire, brew up a cozy cup of tea and get lost in a good book. Mental reset: check!
The perfect cure for cabin fever is thinking about your next vacation. AAA travel advisors are always at the ready to help plan your future dream trips.
What are your tips for beating the winter blues? Share them in the comments.


When looking into different types of bikes, the number and variation of makes, models, subcategories and crossovers can be a little overwhelming.
To find the right bike for you, the first step is to assess the kind of riding you’ll be doing. Consider how and where you plan to use your bike. Will you be traversing dirt or woodland trails, biking around community streets or using it to commute? Once you know your wants and need, you can narrow the scope of your bike search.
Road Bikes
As the name implies, road bikes are best suited for pavement. They tend to be fairly light compared to other bikes and feature smooth, thin tires and “drop” handlebars that bend down. Subcategories of road bikes include cyclocross and touring bikes, which are good for racing and long-distance riding.
Mountain Bikes
Mountain bikes have wider, treaded tires and suspension that absorbs shock, making them perfect for off-road biking on rugged trails and gravel paths. These bikes are for adventurous riders looking to take on unpaved trails.
Hybrid Bikes
Somewhat of a middle-ground between road and mountain bikes, hybrids are suited for both pavement and moderate dirt/gravel roads. The stability and comfort of these general-purpose bikes make them popular among a variety of riders.
Fixed-Gear/Fixed-Wheel Bikes
Also called a “fixie,” this bike is the standard for track racing, though it’s becoming popular among urban cyclists as well. Fixed-gear bikes are not for novice riders, since they require constant pedaling and typically have only front brakes – or no brakes at all.
Cruisers
Similar to hybrid bikes, cruisers offer a comfortable, casual riding experience. These single-speed bikes aren’t very fast, but their “balloon” tires, upright seating position and durability make them easy to ride.
Other/Specialty Bikes
Although there are many more types of bikes, some modern favorites are folding bikes, electric bikes and adult tricycles.
Folding bikes are popular for their compact-ability, making them easy to transport and store. Electric bicycles, or e-bikes, have small motors to assist with pedaling and propulsion. Adult tricycles are a great option for older bike-enthusiasts and people with disabilities, since they are easy to ride and are difficult to tip over. They can also support heavy loads, making them capable of carrying groceries and other tasks.

There are many benefits to bike riding. First, bikes are one of the most eco-friendly modes of transportation. Once they’re on the road, bikes produce zero emissions and require relatively low maintenance.
“Increasing pedestrian and bicycling trips, with a corresponding decrease in automobile trip lengths, by as little as 1 to 3 miles on average, can have a significant effect on both emissions and fuel consumption,” according to the Adventure Cycling Association.
When it comes to individual health benefits, biking is a good aerobic and muscle-building workout while also being low-impact on joints.
Even after you know which type of bike you want, there are still some variations when it comes to finding the perfect fit.
Many bikes come in different frame sizes – like small, medium, large, etc. – based on a rider’s height, weight or both. Seat height and angles can also be adjusted.
You should feel comfortable riding your bike. Although, if this is your first time on a bike, or the first time in a while, some soreness can be expected. When starting up any type of strenuous activity or workout, take it easy on your body, start slow and know that flexing lesser-used muscles gets easier with repetition. If soreness persists or worsens, you may need to make some adjustments to your seat, replace it altogether or invest in some athletic attire suited for cycling.
Whether you’re looking for a bike to exercise or simply get out of the house, it’s important to keep safety in mind while bike riding. Always wear a helmet, follow the rules of the road and stay hydrated to make the most of your excursion.
AAA members can rest assured knowing AAA Northeast offers 24-hour roadside assistance for your bike, too! The free service is available to all members. Learn more.
Which type of bike sounds like your perfect fit? Tell us in the comments below!


You loved showing us your classic and collector car photos, and now the motorcycle enthusiasts came to represent, showing off classic Harleys, custom choppers, sport bikes and others.
Similar to cars, motorcycles are photogenic from just about every angle. In the daytime or at night, in motion or posed, they are effortlessly cool. And the chrome details make for great reflection shots.
Thank You for Participating! (Session Closed)
Browse through all of the photos we received during May’s Motorcycle-themed Photo Session in the slideshow below, and don’t forget to check our social media channels, where we will be sharing some of our favorites. Select photos may also appear in an upcoming issue of Your AAA magazine.

May through September is the most popular time for motorcycles to be on the road, so remember to stay extra aware of bikers when driving. If your are a motorcyclist, hopefully you’ve gotten your seasonal maintenance taken care of and you’re ready to ride safely this summer.
Check out past AAA Photo Sessions and stay tuned for the next one.

In a mirror, in a puddle or on the surface of a perfectly still lake, reflections offer new perspective and make for especially interesting photos.
Browse through all of the photos we received during April’s reflection-themed Photo Session in the slideshow below, and don’t forget to check our social media channels, where we will be sharing some of our favorites. Select photos may also appear in an upcoming issue of Your AAA magazine.

Learn more about reflection photography and the right camera settings to use with these tips from Adobe.
Check out past AAA Photo Sessions and stay tuned for the next one.

Scooped in a cup or swirled into a cone, homemade or from your favorite local shop, ice cream is the sweetest way to cool down on a hot day.
You sent us your best photos of this classic summer treat, delivering all the hot fudge, sprinkle-covered and cherry-topped goodness we’d hoped for.

Check out past AAA Photo Sessions and stay tuned for the next one.

From skylines to skyscrapers, your pictures captured the grit and glory of cities near and far.
Browse through all the submissions we received during August’s cityscapes-themed Photo Session in the slideshow below, and don’t forget to check our social media channels, where we will be sharing some of our favorites. Select photos may also appear in an upcoming issue of Your AAA magazine.

Check out past AAA Photo Sessions and stay tuned for the next one.
Looking for an awesome vantage point of New York City? You’ll find it at the Top of the Rock. AAA members can get up to $5 off tickets to the observation deck.


Our yards come alive in summer.
Nature puts on a show as birds and other wildlife go about their business and gardens reach their peak. By the grill, on the patio, poolside or simply in your favorite lawn chair, it’s a place to relax, gather with friends and soak in all the sun and good vibes the season has to offer.
Although every season has its perks, seeing the yard reach its full potential in summer is what gloomy winter daydreams are made of. In this Photo Session, you showed us the highlights of what’s happening in your yards this year.
Browse through all of the photos we received during July’s yard-themed Photo Session in the slideshow below, and don’t forget to check our social media channels, where we will be sharing some of our favorites. Select photos may also appear in an upcoming issue of Your AAA magazine.

Check out past AAA Photo Sessions and stay tuned for the next one.


America’s national parks are national treasures. Dedicated to the protection and conservation of history and nature in our country’s most spectacular open spaces, they belong to all of us to discover and enjoy.
Browse through the photos we received for the September/October National Park-themed Photo Session in the slideshow below, and don’t forget to check our social media channels, where we will be sharing some of our favorites. Select photos may also appear in an upcoming issue of Your AAA magazine.
For more inspiration for your next trip, see these pro tips for amazing national park photos.

Did you know? AAA was instrumental in creating the National Park-to-Park Highway. A major stride for the American road trip, the route was established in 1920 to connect what was then all 12 national parks through 11 states of the American West.
Check out past AAA Photo Sessions and stay tuned for the next one.
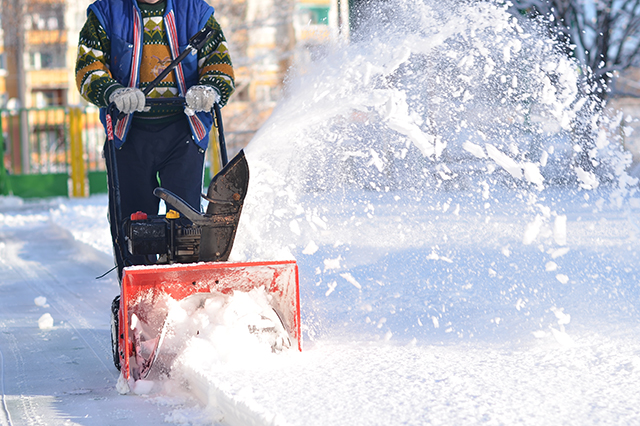
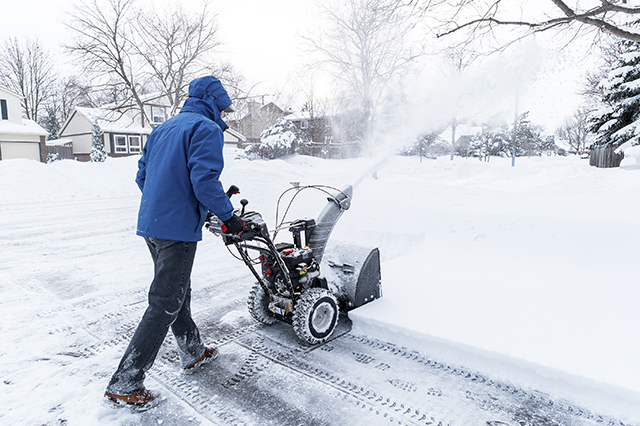
More and more people are turning to a snow blower for their snow maintenance needs. Using a snow blower is fast, efficient and doesn’t require as much effort as shoveling, so it’s no wonder that this technology is being embraced by consumers. Whether you’ll be purchasing a new snow blower this winter, or you just want to take better care of your machine, this guide will give you a helpful overview.
There are two main types of snow blowers: electric-powered and gas-powered. Electric snow blowers are meant for light snow removal. These are either plugged directly into an outlet with a cold weather extension cord or powered by a battery. These models are a lot lighter to carry than gas snow blowers, and are best for small properties where snow removal is minimal. Electric snow blowers are perfect for seniors and others who can’t carry larger models. They’re best for areas that don’t get a ton of snowfall, so if you plan on clearing out a foot of snow this winter, you might want to choose a different model.
Gas snow blowers are divided into three types: single-stage, dual-stage and three-stage. Single-stage blowers are ideal for moderate snow and can take care of most accumulations up to 8 inches. But make sure you don’t use a single-stage on gravel surfaces; since it touches the ground when throwing snow, it’ll shoot out bits of gravel on contact.
If you expect heavier snowfall or live on a large property, a dual-stage model is your best bet; these snow blowers are great for managing snowfall of a foot and higher. You can even use them to clear out ice and heavy, wet snow. If you have a large gravel or concrete driveway you need to clear, or live in area with high average snowfall, this kind of model is a great pick.
Invest in a more powerful model like this if you have a lot of hilly terrain to work with, as this is a lot tougher to manage than snow flat on the ground. And if you’re going to be making a lot of wide turns with your snow blower, you might want to look for a model with power steering.
Finally, three-stage snow blowers are meant for the heaviest snow accumulations. Chances are you won’t need to invest in a three-stage model unless you work in commercial snow removal, or if your area is prone to extremely heavy winter storms. With each stage, the models become a little more expensive, so choose the snow blower you think you’ll need. Many electric snow blowers will do the trick if you have a small yard, so do some research before purchasing your machine and read about the recommended uses for each model.
If you decide to purchase a gas snow blower, you need to remember to change the oil every so often. Make sure to read the instruction manual to see how much oil is recommended for your model, and be sure to double check for any leaks. If you’d rather not worry about replacing the oil and want easier maintenance, consider an electric snow blower.
Aside from replacing the oil, there are a number of parts on your snow blower that will wear down over time and need to be inspected. It’s essential to check your shear pins, which connect the gear case to the auger, to note if they’re missing or broken. You should have a few spare sets of these lying around, just in case they break mid-season. When installing new shear pins, make sure you’re using exact replacements or it could cause damage to the machine.
You’ll also want to inspect your scraper bars and skid shoes; these will wear down as the winter season goes on, so they will need to be replaced as needed to keep the machine functioning properly. The belts are another area you want to keep a close eye on. If you see heavy wear and tear on one of the belts, remove it and replace with a new part, being sure to maintain the same placement.
It’s important to make sure you store your snow blower properly. Because you’ll use it so often in the winter, you might consider leaving it outside. However, you may have trouble starting it if it’s constantly exposed to frigid temperatures. Your best bet is to leave it in your garage where it won’t be too exposed to the elements.
Learn about homeowners and condo insurance from AAA.
Got a great snow blower maintenance tip? Leave it in our comment section.
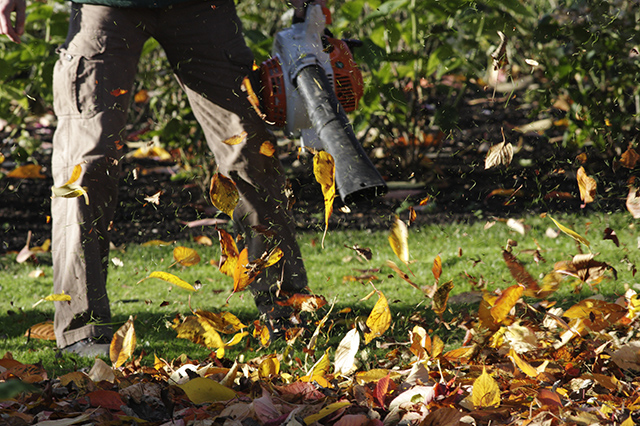
For many people, fall is their favorite time of year. It’s not too hot and not too cold, there’s a holiday all about eating candy and a second holiday all about eating way too much dinner, and it’s when the leaves make their colorful transition.
But if you have a house and a lawn, you might be dreading the time of year when the leaves start to fall. Landscaping fall cleanup can be a chore but it is necessary to maintain both the beauty and safety of your property.
What should you be doing to prepare your lawn and garden for winter? Here are a few landscaping tips.
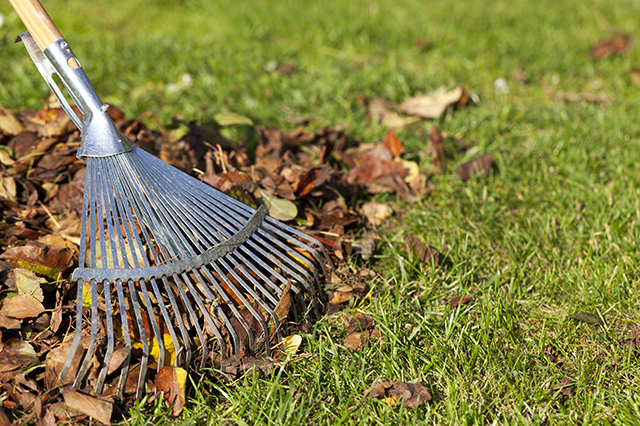
Ideally, you should clean up fallen leaves once a week. Too many leaves can damage your lawn, because deep leaf cover blocks the grass from getting sun. Some people don’t have time to do leaf cleanup every week, but try to do it on a regular basis. Don’t leave it all for one big job at the end of the season – that’s too much for anybody to handle, and your lawn will look pretty scraggly by the time you uncover it.
One of the easiest ways to deal with fallen leaves is by using a mulching mower. A mulching mower will break down leaves and filter them back into the lawn. Chopped up leaves make a tasty mulch snack for the grass. This method works best for yards that only have a slight leaf cover – too many trees and leaves will probably require you to go over your lawn a few more times with the mower. If you want you can collect your leaf scraps into a lawnmower bag and use them as nutritious mulch for other parts of your garden.
If you’d like to use a leaf blower, just be sure to do it on a dry day. Wet leaves make the task much more difficult, since they stick to the ground and to each other.
The easiest way to collect your leaves is to rake them onto a leaf tarp or drop cloth. You can drag the tarp along with you as you build up your pile, then you can deposit your collected leaves as you see fit (or as your town sees fit). It’s much easier than having to deal with a bunch of loose piles all over your yard. Even if you have to use a leaf bag, the tarp can make for an excellent funnel (with the help of another pair of hands to hold the bag). It makes the whole process a lot easier.
A wide rake that doesn’t snag on too many leaves can also make the task go a lot faster.
Another important part of leaf cleanup is clearing fallen leaves from your home’s gutters. Clogged gutters could contribute to ice damming in the winter, one of the most common winter insurance claims. Caused by snow melting on a warm roof, ice damming occurs when water runs down and freezes at the eaves. As the dams melt, they can leave water pools that can seep into your home and cause water damage. Clean gutters won’t eliminate the possibility of ice damming, but it will certainly decrease it.
Fall is a great time to give your lawn some extra love and care, since it’s probably facing some rough winter months ahead.
This is a good time to aerate your lawn. Aerating is almost impossible to do once the ground is frozen, so you should take care of it while you’re doing landscaping fall cleanup.
An aerator is a tool that plunges out “plugs” of soil and pulls them out of the lawn, creating small holes. This helps to loosen soil that has become too densely packed, and it gives the roots some breathing room to access water, air and other important nutrients. Don’t worry about picking the plugs up – they will break down on their own and return their own nutrients to the lawn.
The easiest way to aerate is to do it when the soil is moist and it’s easy to pull the plugs out. Even though the soil is already wet, you should thoroughly water the lawn after you aerate it.
This is also the perfect time of year to fertilize your lawn and garden (which you can even do with some of the leaves you mulched earlier). Just make sure you apply your fertilizer about two or three weeks before the ground freezes. That’s when it can have the most impact, strengthening root and blade growth. After you apply fertilizer, water your lawn so that the fertilizer sloughs off the blades of grass and goes into the soil.
Leaves aren’t the only things that can fall down. In fall, you’ll have a better view of the trees and branches near your house, and you’ll be able to tell which limbs are diseased or dying. Although you can plan which limbs to prune throughout fall, it’s better to wait until very late in the season. Limbs that are pruned too early in fall could become diseased or even spur regrowth. When the cold has truly set in (mid to late November in the Northeast), then you can get to it.
But why prune your trees? Pruning can excise dying and diseased branches, it’s true, but it can also make your tree stronger and more attractive. It will also let more light onto your yard and into your house, which you’ll need as the daylight hours get shorter.
Dead and diseased branches that can fall create an insurance risk. If they just fall onto your lawn, that’s no big deal. But if they fall on your house, a car or walking pedestrian, that can be a big problem. Pruning also reduces the amount of branches that could fall during a heavy storm.
Learn how you can protect your home from weather-related risks and liabilities with homeowners insurance through AAA.
If your branches require a ladder to reach, or if you are inexperienced with sharp tools, calling a landscaper or arborist to groom your trees is the safest option.
What’s your go-to method for landscaping fall cleanup? Let us know in the comments below!

Hitting the open road is a traveler’s dream. You get to decide where and when you want to go, how far you want to travel, what you want to see – it’s a freedom unlike any other form of traveling. However, that doesn’t mean that simply getting up and going is the best course of action. A significant amount of planning and preparation should go into any road trip you take. Here’s how to prepare for a road trip so that your next highway adventure is as carefree as you imagined.

For more road trip tips and tricks, listen to Episode 5 of our podcast, Merging Into Life: Road Trip Starter Pack.
Tune InYour road trip can be over before it starts if your car is not up to the task. Before embarking on your journey, bring your car to a trusted auto repair shop for a thorough inspection.
Check that tires are properly inflated and in solid condition, fluids are topped-off or changed if they are dirty or contaminated, radiator and cooling system are in proper operation, and belts and hoses are in good shape.
If your car has a spare tire, make sure it is properly inflated and in working condition.
All these steps are relatively easy and inexpensive. But if you wait until something breaks or goes wrong, it could lead to a costly repair.
Preparing your car for a road trip could also mean the cars you are leaving behind.
If your road trip means keeping another vehicle at home, especially for more than a month, consider using a battery tender. These devices transfer power from an AC outlet to the car’s battery to keep it fully charged. It is also a good idea to fill your gas tank and add a fuel stabilizer, fill fluids and tires to appropriate levels, and remove anything that might attract critters, such as beverages (even water), snacks and pet food. Covering your car can protect the paint and prevent stains while you’re away.
When you return from your trip, start the vehicle and drive it gently for several miles. Then have your repair shop look it over.
No matter how much preparation you put into your trip, emergencies can still arise. And when they do, you’ll want to be ready. In addition to having AAA Roadside Assistance on call, you should also have proper supplies on hand.
Certain items you should pack are a first aid kit, fire extinguisher, jumper cables, motor oil, radiator fluid, nonperishable food, drinking water, blankets and a roadside emergency kit with flares and flashlight. Keep a lug wrench and jack in the car in case you need to change a tire. If your vehicle does not come with a spare tire (around 30% of new cars do not), consider buying one. On a long car trip, a flat-tire kit may not be enough.
Make sure all your emergency supplies are easily accessible. Having them packed away deep within your car won’t help should you need them immediately.
Also check that all your important documents, such as registration and insurance, are up-to-date and stored safely should they be needed.
If you’re traveling far from home, particularly through other states, brush up on any local driving laws that may be different than what you’re accustomed to.
For instance, in Northeastern states, interstate speed limits top off at 65 mph. However, out West, speed limits can go up to 80 mph. Another example – New York allows drivers to make a right turn at a red light. However, motorists are not allowed to turn on a red light in New York City unless a sign that permits it is posted.
Knowing laws like these can keep you safe and prevent you from getting a ticket.
You should figure out, roughly, how much this trip is going to cost you. Even if you have prepaid for items such as hotel rooms, it’s a good plan to know how much money you should bring with you or have accessible. Running into financial troubles away from home is not a recipe for a joyous vacation.
A major cost on your trip will be gasoline. Before you head out, check the gas price averages of the states you’ll be passing through. You should also download the AAA Mobile App, which can show you the cheapest gas stations in the area you’re in. These gas saving tips can also help.
If you’re considering a rooftop carrier, “keep in mind that fuel economy could be reduced by up to 20%, depending on the design of the carrier,” said AAA Car Doctor John Paul.
Other cost considerations include tolls and attractions.

When planning a road trip – particularly a long one – you’ll want to spend a good amount of time mapping out your desired route. This means more than typing an address into your GPS.
Navigation systems serve an important function and are extremely useful when driving in unfamiliar territory. Following a GPS will get you to your desired location in the fastest, most direct route. But what if you prefer to take the scenic route? Or there’s a particular roadside attraction you’d like to visit?
A good idea is investing in an old-school paper map, on which you can see all the possible roadway options available to you and you can draw out your planned route.
In the end, planning your course on a paper map and then executing it through the help of GPS may be your best option.
It’s not just your route that needs planning. You should also decide where you’re going to make your stops, whether they be for rests, meals or overnight stays.
It’s incredibly important to be honest with yourself in this department, particularly when stopping for the night. Sure, you may think you can pull a marathon driving session late into the evening, but it’s not a good idea. You could easily find yourself exhausted, opening yourself up to the dangers of drowsy driving. Plan your overnight stops conservatively. It’s better to get to your location alert, feeling like you could drive another hour or two than finding yourself tired but still two hours from your destination.
AAA recommends scheduling a break for every two hours or 100 miles, traveling with an alert passenger or taking turns driving, and, if necessary, pulling over to a safe place for a 20- to 30-minute nap.
When the day comes to hit the road, every detail should be taken care of. The car should be packed, gas tank should be filled, road maps ready. All you should have to do is wake up and get out the door. But speaking of waking up, make sure to get a good night’s sleep and have some food in your stomach before you depart. You want to be in the best condition possible before you get behind the wheel. This will go a long way to ensuring you have a fun and safe road trip.
Need a ride? Learn about exclusive Hertz discounts for AAA members.
What tips do you have for planning the perfect road trip? Tell us in the comments below!
From flat tires to dead batteries, car trouble is unpredictable. And if you are well-versed in Murphy’s law, you know that car emergencies like blowouts, breakdowns and running out of gas tend to happen when conditions aren’t exactly ideal.
You never know what the time, location or weather conditions will be like when you find yourself stuck or in need of help. To maintain a sense of comfort and security on the road, there are certain things to keep in your car that could helpful in an emergency or in a pinch.
Aside from keeping the AAA Roadside Assistance number handy (1-800-AAA-HELP) or downloading the AAA Mobile app to request and track roadside assistance in minutes, a well-stocked car could be a lifesaver while waiting for help to come or for temporary fixes before getting your car to the service station.
You can assemble your own emergency safety kit or purchase one. AAA emergency kits come in all different sizes and are sold at most AAA stores. They can also be found at many auto stores, Target and online. When buying a kit, it is a smart idea to supplement it with extra items, especially those that are specific to your car and personal needs. If you have kids, there are a few extra items you should always keep on hand.
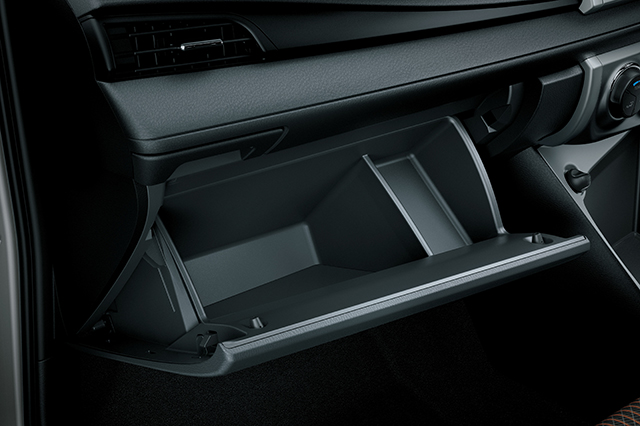
Built into your vehicle’s dashboard, right over the front-seat passenger’s footwell, is an often underutilized space: the glove compartment. And at around 100 cubic inches, it’s important to maximize the little space you have.
We recommend using your glove compartment for items that are meant to be placed and forgotten about until you need them. It’s sort of like breaking the glass in case of an emergency, only without the glass.
What do you think are the most important things to keep in your car? Tell us what you never drive away without in the comments.
Don’t forget to add AAA Roadside Assistance to your contact list (1-800-AAA-HELP) or use the AAA Mobile app to request assistance online.
We only have one planet Earth, making Earth Day the official reminder to treat our planet well. Though this environmentally friendly holiday is celebrated once a year (April 22 marks the event’s 52nd anniversary) these eco-friendly products for your home will help make every day a little greener.
With many brands using buzzwords like “sustainable,” “natural” and “zero-waste,” it can be hard to decipher what’s truly good for the planet and what’s hype. Start by reading the label and looking for products that have green certifications. It can take a little more planning and searching for the right goods, but in the long run you can save a lot of money by supporting Mother Nature (just a bonus!).
So whether you’re going zero-waste and stopping the use of single-use plastic products or you just want to start by shopping with a reusable bag, this green guide will help you adjust your carbon footprint. Remember, every small change makes a difference.
Kitchen waste accounts for much of the trash that comes from the common household – from eggshells and coffee grinds to copious amounts of single-use plastics. Start by thinking about where most of your kitchen waste comes from and find eco-friendly products to tackle those items.
Bee’s Wrap is reusable wrap made from cotton and beeswax that can replace plastic wrap and aluminum foil. You can swap out plastic containers with reusable containers made from more sustainable materials (look for glass or steel) like Klean Kanteen and LunchBots. Replace kitchen paper towels and sponges with things like NotPaper Towels, which can be washed and reused, or Swedish dishcloths, which are made from wood and cotton.
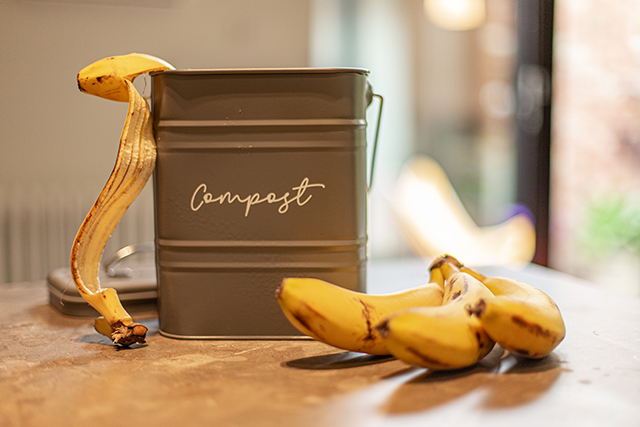
Another simple way to care for the planet is by composting your food waste. Start by simply collecting any food waste on your counter in a compost bin. Set up a compost bin in your yard or bring your food scraps to a local farmers market.
When making a trip to the grocery store, bring your own reusable shopping bags. Several states – including Connecticut, Maine, New York and Vermont – banned plastic bags in stores. Envirosax and Baggu are two sustainable brands that offer a variety of stylish reusable bags. Boon Supply, another eco-conscious brand, has products like these farmer’s market totes – made famous by the French – that are perfect for carrying fruit and veggies. Store smaller produce like berries or peas in these mesh drawstring bags. Bye-bye plastic bags!
The second-largest culprit for creating households waste is the bathroom. Between toothpaste containers, disposable razors and beauty and grooming products, your trash can fill up quickly. Instead of plastic and single-use products, look for brands with sustainable packaging that sell in bulk (less packaging) or have a refill program. This is a simple way to save a lot of money.
Think how many disposable razors you buy in one year. Swap this with a reusable razor from Leaf Shave that has a lifetime warranty. You’ll then only have to replace the razor blades. David’s is a green toothpaste brand with a recyclable metal tube and Georganics makes a variety of sustainable oral care products, including bamboo toothbrushes and mouthwash tablets with refills.
Deodorant, skin care, hair care? Opt for personal care products that have natural ingredients, recyclable packing or are reusable. Support brands that have a mission to care for the planet like Weleda, which makes plant-rich skincare products, Meow Meow Tweet, a small-batch vegan skin care company, and Attitude, where their natural products are EWG Verified. LastSwab makes reusable cotton swabs (you just wash with soap and water after using), while By Human+kind features a refillable packaging program for everything from shampoo to hand soap.
When thinking eco-friendly products, you may not necessarily think about things like a greener shower curtain or toilet paper, but there are greener options available. Coyuchi makes items like organic cotton shower curtains (no plastic liners needed) and bathroom towels made with practices that limit harm to the environment. Did you know that global toilet paper production consumes 27,000 trees daily? Save the trees and use toilet paper made from bamboo or skip toilet paper and go the European route by attaching a bidet to your toilet.

Most people spend about one third of their lives sleeping, so it makes sense to ensure your sleeping materials are green. Sleep and Beyond makes organic and natural bedding like sheets, pillows, comforters and mattress pads that are made in sustainable and fair-trade factories. Don’t forget your mattress! The Avocado Green mattress sounds as green as you think and is made from natural materials
Set the mood with solar lighting! Whether you’re camping or at home, Biolite makes a solar lighting starter kit to ease you into the world of renewable energy.
Consider cleaning with eco-friendly products made without harsh chemicals. Supernatural is a cleaning line that uses essential oils and offers refillable bottles. Win, win. Dr. Bronner has been a pioneer in natural products and saving the planet for years: its castile soap has 18 recommended uses for cleaning – face, body, hair, dishes, laundry, mopping, pets and more.
What about your dishwasher? Try Dropps, natural detergent pods that can be purchased as a subscription or in bulk. Need sponges? Sqwishful makes a plant-based compostable pop-up sponge and if you’re looking for reusable cleaning tools like brushes, Redecker has got your covered.
Tons of wrapping paper goes to landfills each year. Combat this by buying sustainable paper or by supporting a reusable solution like Lilywrap, reusable fabric gift wrap with bows that can be used more than 50 times.
Not sure how to recycle an item? Visit TerraCycle.com, a resource that gives more information, tips and a list of brands that partner with the site to help recycle packaging.
What are your favorite eco-friendly products for the home? Share them with us in the comments below.
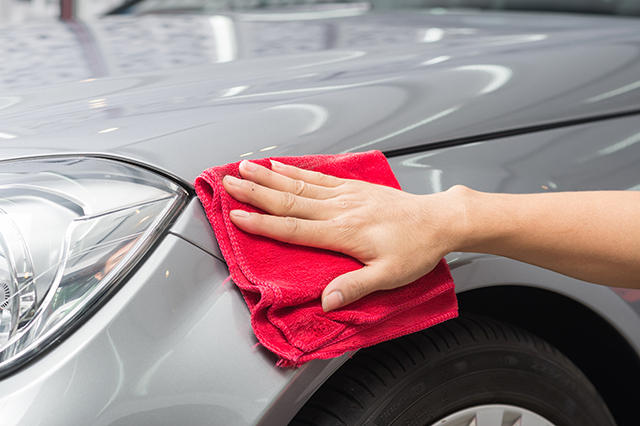
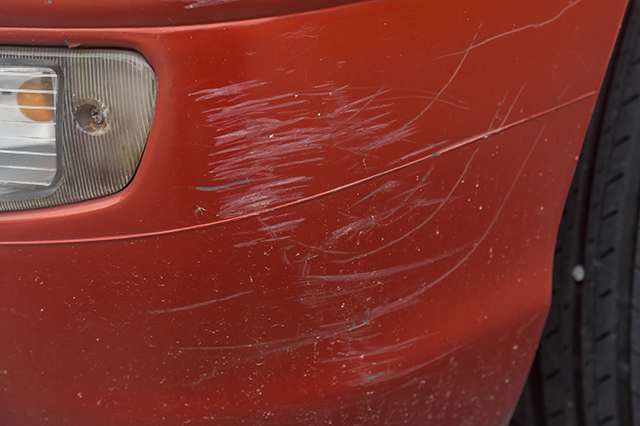
You’re closing in on your parked car and there it is again: that eyesore of a paint scratch above the driver’s side door handle. If only you knew how to get rid of it, or at least where to start.
We spoke to Mike Stoops, product and training specialist at Meguiar’s car care products, to find out how to remove scratches. Rule number one, Stoops said: If you can feel the scratch with your fingernail, it may be too deep for an easy fix. If you can see but not feel the scratch, and want to give fixing it a go, keep reading for his tips on how to remove scratches from car paint.
Q: What kind of equipment do I need?
A: Ideally, you want to get a mild scratch removal product; you don’t need a real aggressive product for this kind of repair. What you do want is to be careful of the applicator you use. People tend to grab an old cotton shop rag or an old cotton wash cloth. That material can haze the paint. Really, the smarter move is to go with a nice clean microfiber towel or, better yet, a soft foam wax applicator pad.
Q: What’s the first thing to know about how to remove scratches from car paint?
A: Paint is hard, paint is thin, and therefore you need to proceed with caution. Even when working by hand (instead of using a buffer), I’ve seen people get overly aggressive and run into problems.

Q: Can you explain the layers of paint on a vehicle?
A: Regardless of if it’s a steel body car or an aluminum body car – or even composite like the Chevy Corvette – all vehicles are covered in a primer coat, a color coat and then a clear coat, which adds the gloss and UV protection to the color below it. And your hope is that whatever scratch you have is only in the clear coat. If you can see it, but you can’t feel it, that’s actually a good sign. If you can’t feel it, you can probably get rid of it.
Q: Once you have your scratch remover and your pad, how do you get started?
A: First, you want to remove any loose dirt or dust from the surface to avoid grinding it into the paint. Spray the area down (with water) and then wipe it dry with a clean microfiber towel. That’s usually more than sufficient to prep the area, if we’re dealing with an isolated scratch.
Q: How much scratch remover should I use?
A: Squeeze a dollop the size of a 50-cent piece – I don’t know how many people remember how big a 50-cent piece is, so let’s call it a “fat quarter” – onto the middle of your applicator pad.
Q: How much of the surrounding area should you hit with the product?
A: If the scratch is, say, about a quarter- or half-inch long, don’t work just that tiny little area. Work an area around it, maybe 6 to 12 square inches.
Q: What kind of motion should you use to apply the scratch remover?
A: It doesn’t really matter if you work it in a circular motion or a straight line motion. Do whichever is most comfortable for you. Work that with some energy. We’re not applying a wax, so you do not want to just lightly apply the product and walk away to let it dry, that’s not going to do anything. That’s a very common mistake. These products have superfine abrasives in them that are used to mechanically work the paint down and remove the scratch, and they don’t do that on their own, they need your help.
Q: How long should you work the product into the scratch?
A: Work the product for 20 seconds or so. Then it will become a very thin translucent film on the surface. Wipe off the residue. Don’t let it dry. These products serve no purpose if you let them dry. Plus, they can be a little difficult to remove if they dry on the paint.
Q: It didn’t go away immediately. Did I do it right?
A: You want to start out lightly. If the first application doesn’t remove the scratch entirely but makes a visual improvement, that’s actually a really good thing. I’d almost rather see that you didn’t fix everything on the first attempt than watch you remove more paint than you actually needed to. Taking two or three applications to slowly get in there is really the perfect way to do it.

Q: Why is aggressively applying a scratch removal product a problem?
A: Take one of your thumbs and rub it vigorously into the palm of your other hand. It will get hot very quickly. Modern paint does not like heat and modern paint does not like concentrated friction. You can literally rub through your entire clear coat in a matter of minutes regardless of what liquid you’re using, especially if you use an aggressive applicator.
And that’s how to remove scratches from car paint.
Have any other tips? Leave them for us in the comments.